Configuring an e-mail profile
An e-mail profile contains information about the account to be used by PcVue when sending an e-mail. The account supplies information such as the SMTP server name and is similar to the account configuration for e-mail software such as Microsoft Outlook Express. In this version, there is one account per profile.
Provision has been made for future versions to have multiple accounts selected in a priority order.
How to configure an e-mail profile
- Creating the profile.
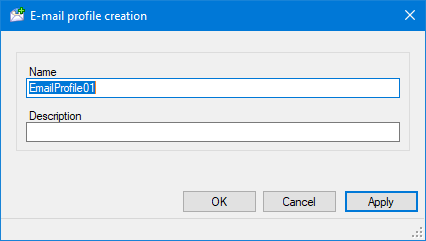
- Select the E-mail profiles folder in the Application Explorer configuration tree and, from the task list, select Add a new e-mail profile. A dialog to configure the new e-mail profile will open.
 Show picture
 - Enter a name for the profile. You can either accept the suggested name or type in one of your own.
- Enter a description of the profile. The description appears in the contents pane of the Application Explorer and can be useful to identify the profile later. The description is optional.
- Click the OK button to confirm the creation of the profile. The E-mail profile dialog closes and new dialog opens from where the e-mail account is configured.
- Select the E-mail profiles folder in the Application Explorer configuration tree and, from the task list, select Add a new e-mail profile. A dialog to configure the new e-mail profile will open.
- Configuring the account - E-mail Account dialog, General tab. Show picture
- Enter a name for the account. You can either accept the suggested name or type in one of your own.
- Enter a description of the account. The description appears in the contents pane of the Application Explorer and can be useful to identify the account later. The description is optional.
- Enter a valid address in the E-mail address field. This will appear in the From field of the recipient's e-mail client and is mandatory.
- Enter a display name. If configured, this will be displayed in the From field of the recipient's message client instead of the source e-mail address. The Display name is optional.
- Enter a valid message address in the Reply-to address field. This will be used by the recipient's message client if the recipient chooses to reply to the message. The Reply-to address is optional.
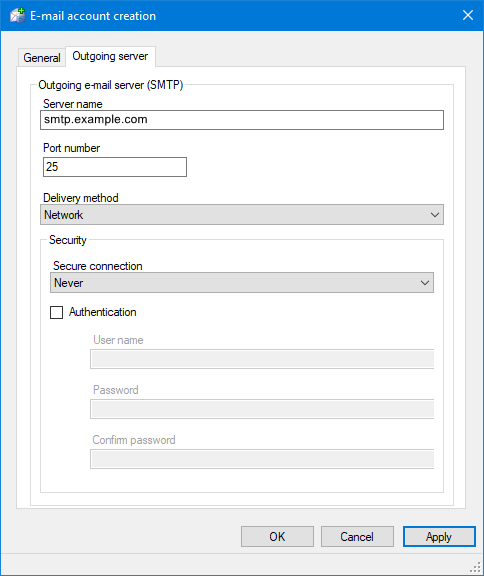
- Configuring the outgoing server - E-mail Account dialog, Outgoing Server tab. Show picture
- Enter the name of your outgoing (SMTP) mail server in the Server name field.
- Enter the outgoing mail server port number in the Port number field. The default is 25.
- Select the delivery method, either From IIS directory if using a local IIS server, or Network if using an external SMTP server (default).
- If your server requires a secure connection, select the secure transport it supports, either Explicit TLS or Implicit TLS. If it does not require a secure connection, select Never.
- If your server requires authentication tick the Authentication box and enter a user name and password.
- Click OK to confirm the configuration and close the dialog.
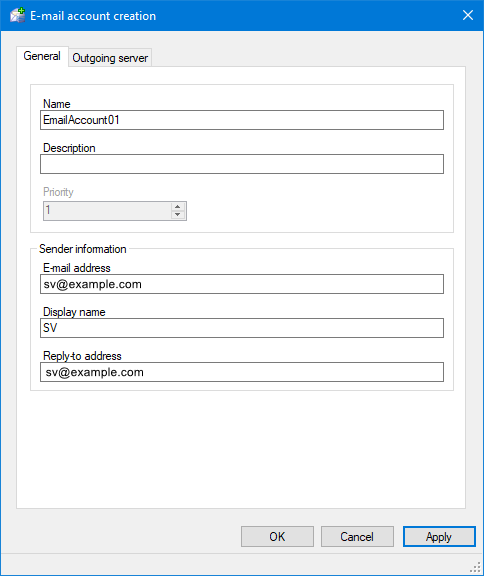
The Priority property in the General tab is not used in this version.
Explicit TLS usually requires the use of port 587 and Implicit TLS port 465. Please check with your service provider to select the appropriate secure connection type and associated port.