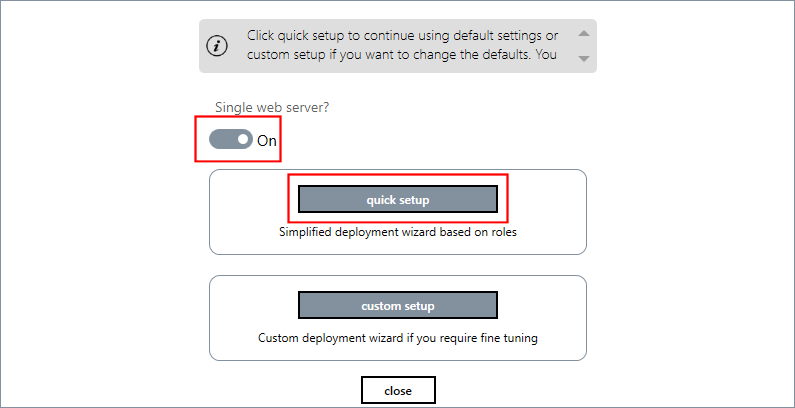
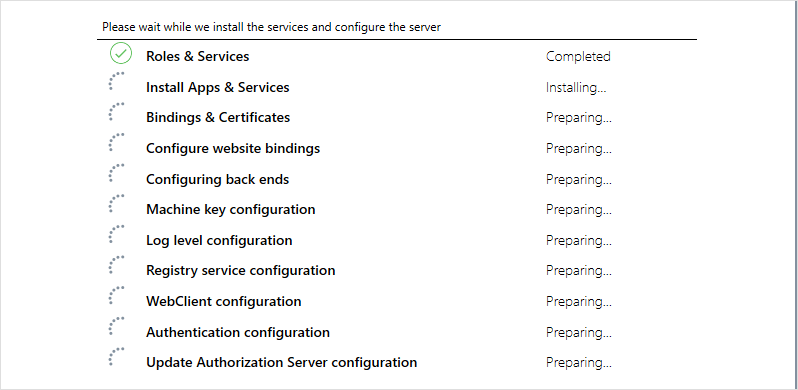
Using the Quick Setup Wizard
The Quick Setup wizard takes you through the steps to deploy a site, web services and web apps using mainly default settings. The Quick Setup Wizard can be used if all services must be deployed on the same web server. ![]() Show picture
Show picture
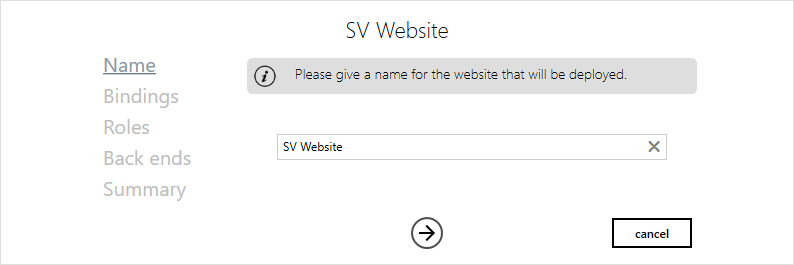
The Quick Setup wizard guides you through the following steps.
- Name - The name by which the site is known. The name appears in the Sites node of the IIS configuration. The default is SV Website.
 Show picture
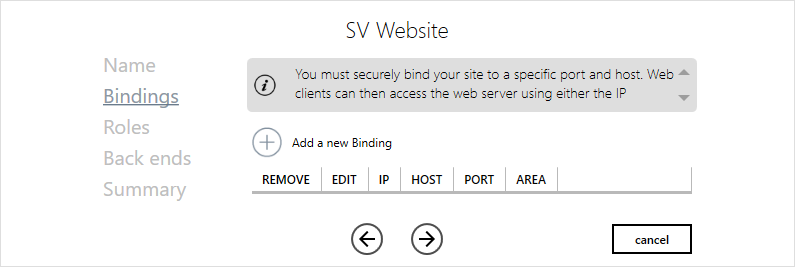
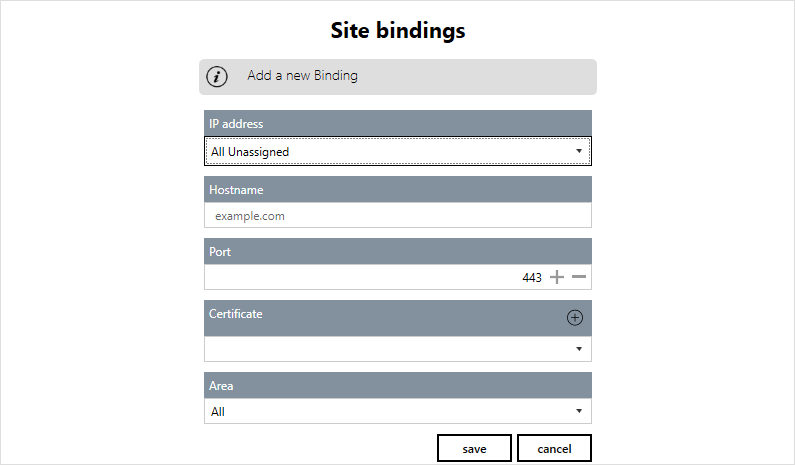
 - Bindings - The binding specifies the domain, port and server certificate used by the client web apps to connect to the web server. You can create one or more bindings. See notes below about why you might need to create more than one binding. Show picture
To add a binding click Add a new binding.Show picture- IP address - The IP address from which the website will receive incoming requests.
Using All Unassigned (default) tells the IIS server to transmit to this web site incoming requests received on all IP address not explicitly assigned to another web site. If you select a specific IP address, the IIS server only transmits to this web site incoming requests received on the given IP address only. Typically used when the web services are hosted on an IIS server where there are also other company resources (intranet etc.). - Hostname - You can use either a hostname or the IP address. If you use a hostname, the network must include a mechanism by which it can be resolved, that is its IP address found. Windows hosted clients can use the integrated Windows Internet Name Service (WINS). For other hosts, Android for example, a DNS server must be available. For example, if you enter <MyHostName> as the hostname, web clients will be able to connect to the WebVue on this web server using the Url https://<MyHostName>/WebClient.
While the use of an IP address as the hostname can be handy on test machines, this practice must be avoided as it prevents from using a proper certificate. - Port - The port on which the website listens for incoming requests.
- Certificate - Choose a certificate for the site using the Certificate drop down list box. You must have a certificate in order to use HTTPS. You can either select an existing certificate or create a new one using the + button. There are a number of certificate types that can be used. The type that is acceptable will depend on the IT policy. See the book What is, and Why do I Need, a Certificate?
- Area - Defines if the binding is to be used only for communication between web applications within the server (Internal), for user access (Public) or both (All). All is the default. See the below for examples.
- IP address - The IP address from which the website will receive incoming requests.
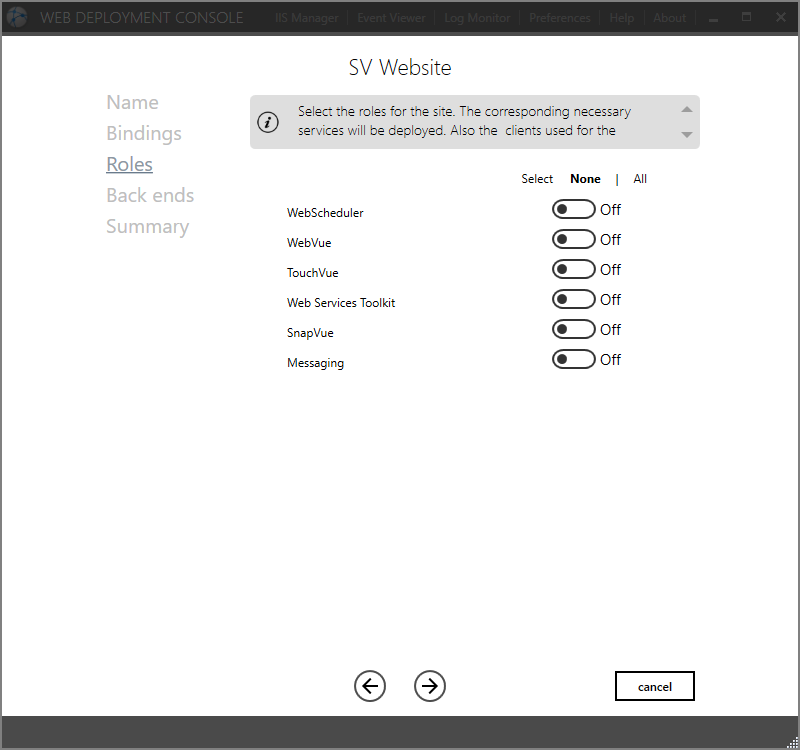
- Roles - Select the roles that the site is to support. Show picture
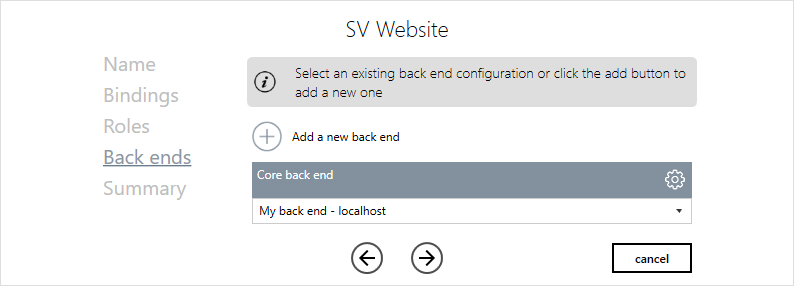
- Back ends - Select the back ends, which define the connection between the IIS web server and PcVue. Depending on the configuration, you will require one or more back ends. For example, if you were using WebVue and SnapVue, you would require both the Core back end and the Geolocation back end. If you were using the Instant Messaging with SnapVue, you would also require the Messaging back end. Show picture
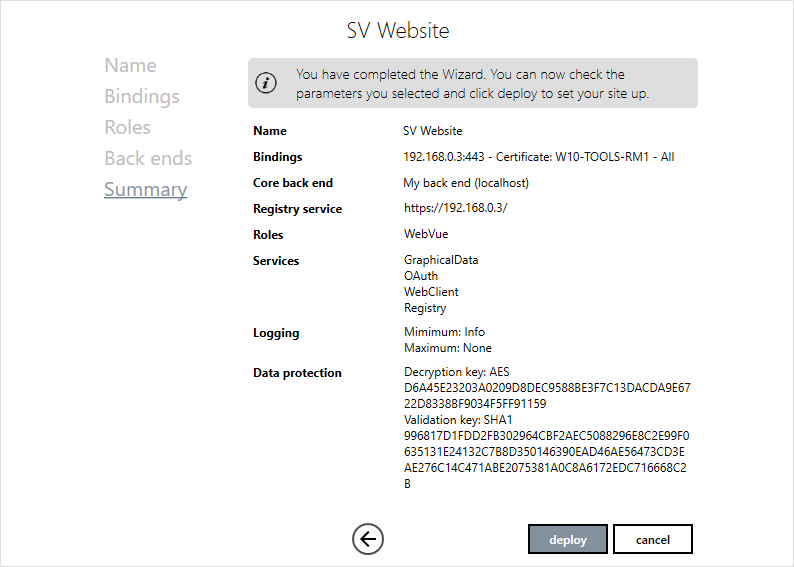
- Summary - The final step in which the configuration to be deployed can be reviewed. Show picture
- Clicking Deploy completes the wizard and deploys the site. Show picture
- When deployment has finished the wizard can be closed. The WDC then shows the newly created site. Show picture
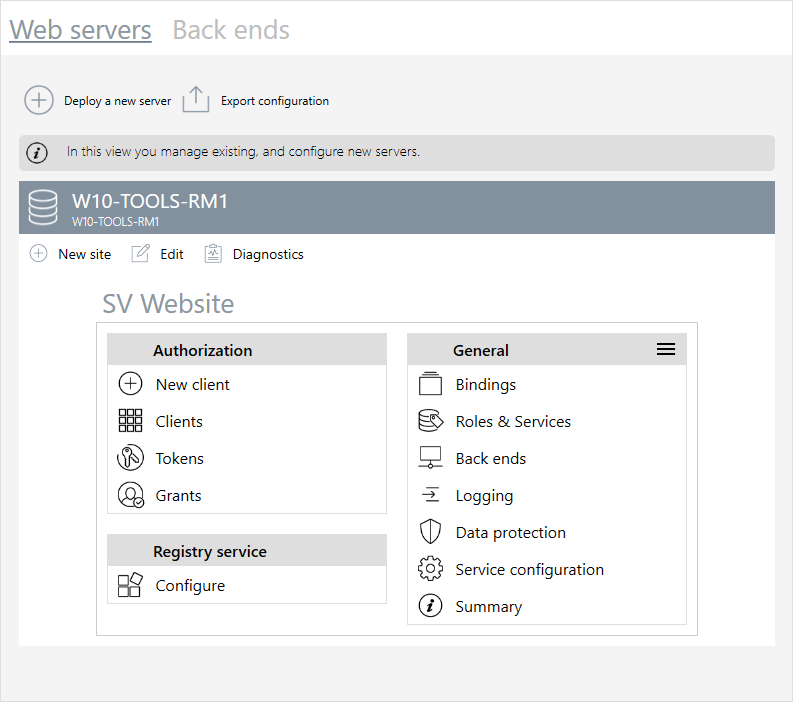
Clicking the Service configuration item of your site opens a panel with the list of deployed web services and apps.Icons are available to launch directly the desired web application with your web browser.
You can generate a QR code to quickly test the connection to the newly deployed website from a mobile app. Click on the Generate QR code button, start TouchVue or SnapVue an scan the QR code from the Account view. The Web server host and port are automatically filled in, you just have to enter your user credentials to connect.
Why would you need more than one binding?
Depending on the IT infrastructure and network setup, web clients may need to address the server using different hostnames depending on which network they connect from. For example, clients connecting from the internal network may need to use a hostname only valid from the company office network (for example https://mycompany.local), while clients connecting from the internet may need to use another hostname valid from the public internet (for example https://extranet.mycompany.com).
A similar case is for internal calls between services deployed on the IIS server. There must be a valid binding for these calls, including a hostname that can be resolved from within the IIS server itself.
There are various solutions, in particular, hairpinning whenever the web server is behind a router. But it can be easier just to create two bindings with different hostnames, certificates and area settings.
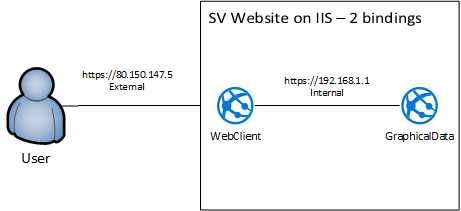
Consider the following scenario. An IIS Web server with private IP 192.168.1.1 hosts WebVue. The Web Server is behind a router accessible with the public IP 80.150.147.5. Users access WebVue from the internet using the Url https://webvue.example.com/WebClient.
- Option 1
A single binding using hostname = webvue.example.com (FQDN - Fully Qualified Domain name) and Area = All.
A DNS server is required on the public network to ensure that the hostname is resolved to the public IP 80.150.147.5 for the user.
A DNS server behind the router (or properly configured host file on the IIS Web Server) is required to ensure that, internally for the web applications, the hostname is resolved to the private IP 192.168.1.1.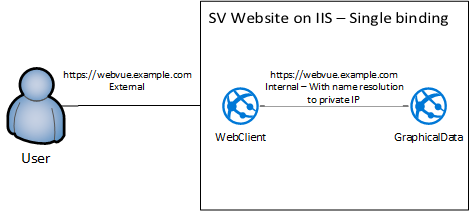
- Option 2
A single binding using hostname = webvue.example.com (FQDN - Fully Qualified Domain name) and Area = All.
With Hairpinning enabled at the router, no need for name resolution to the private IP on the IIS web server, the configured host name can be used for internal requests between web services, they will pass through the router.
A DNS server is required on the public network to ensure that the hostname is resolved to the public IP 80.150.147.5 for the user.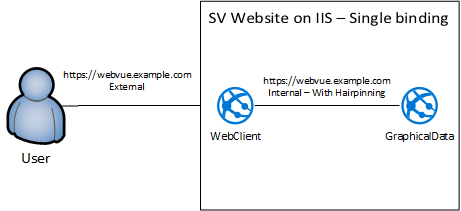
While the following is not recommended in production or if the public IP is accessible from non-trusted computers, the same can be achieved on a test platform with a similar network segmentation using only IP addresses and a self-signed certificate (instead of a hostname requiring a DNS and a trusted certificate).
One binding using hostname = 80.150.147.5 (public IP address) and Area = Public.
A second binding with hostname = 192.168.1.1 (private IP address) and Area = Internal.