Accounts View
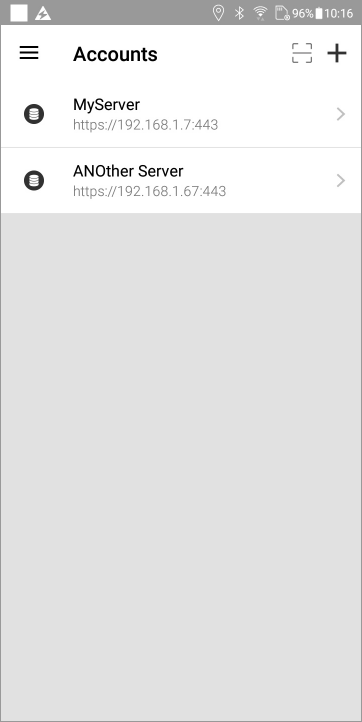
The Accounts view is used to manage the accounts used to connect the app to the Web server. The app can be configured for, and simultaneously connect to, one or more server. This view is automatically displayed if you start the app and no account is configured.
A user account is required for each server. ![]() Show picture
Show picture
How to add an account
To add an account tap the large '+' sign at the top of the Accounts view. The Server Configuration view opens. ![]() Show picture
Show picture
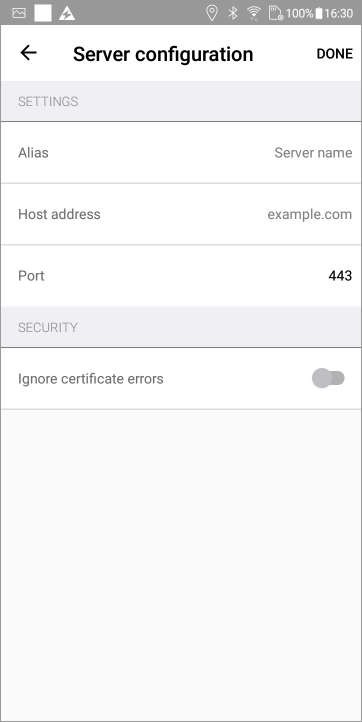
- Enter an Alias for the account. This is the name used to identify the account and is displayed in several views and the menu drawer.
- Enter the Host Addresss of the computer hosting the web server. This can be either the domain name or IP address.
- Confirm the Port number. Port 443 is used by default.
- To ignore certificate errors with Https, enable Ignore Certificate Errors.
- Select DONE from the top right hand of the screen. The Login view is displayed.
Ignore certificate errors is useful if the web server does not have a valid certificate. It should only be used on isolated development machines, and never be used in production.
If you have been given a QR code, tap the scan button near the '+' button to scan the QR code. The Alias, host address and port are automatically filled, step 1 to 5 are skipped and you are directed to the Login view.
Other actions available from the Accounts view
- Tapping an account name displays either the Login view for that account or the Status view if already logged in.
- Tapping the right arrow adjacent to the account name displays other actions associated with the account.
- REMOVE - Delete the account configuration.