How to import an Echelon LNS configuration
The Smart Generator for LNS (LonWorks Network Operating System) imports configuration data from a LonWorks Network file of a LonWorks database. From that file, it generates the following configuration elements in PcVue:
-
LNS data acquisition network and nodes.
-
I/O variables including mapping onto the LNS nodes.
The names of the variables generated in PcVue are constructed from the names of the LNS network components as follows: Device.LonMark Object.Network variable.Variable field.
The Smart Generator 'flattens' certain parts of the LNS data structure to avoid over-long branch paths. As a result duplicate device names may be generated from different LNS sub-networks which must be edited before the import is completed.
For the smart generator to run, you must have the LonWorks software components installed on the PC including the LonWorks Object Server.
Refer to the overview topic Smart Generators overview to learn more.
Selecting the source data
Before you start the import process, we recommend that you back up the PcVue variables configuration in case of any problems occurring during the import process. The variable configuration is stored in the file VAREXP.DAT in the project's C folder.
Make sure that PcVue is shut down before copying the file.
-
Go to Configure then Smart Generators and click New LNS import. The Smart Generator for LNS dialog opens with the import name specified. You can change this name.
-
Select an LNS network in the Network drop-down box. The drop down list box is populated with all networks known to the LonWorks database.
The process of importing has no effect on the LNS project from which it extracts the data.
-
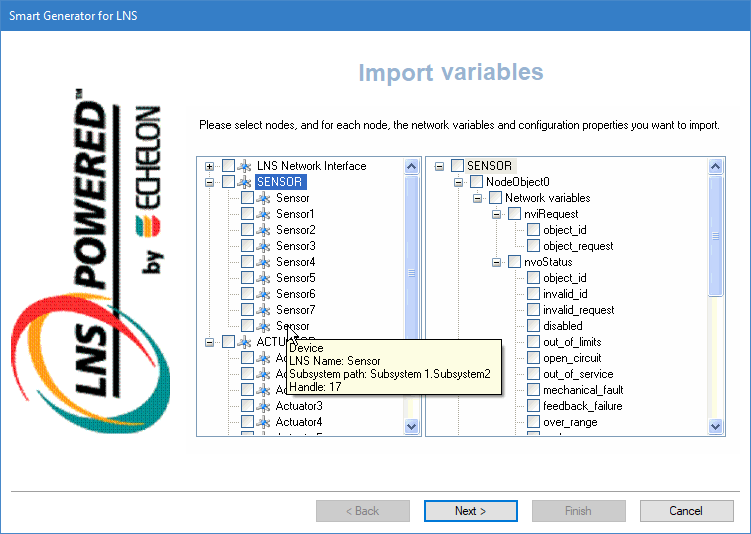
Click Next, the LNS import variable dialog opens displaying the templates and nodes in the left pane. The template named LNS Network Interface is always present, representing the network interface (card) of the network concerned. The right pane of the dialog displays details of the selected template including its LonMark objects, network variables, and variable fields.
 Show picture
The LNS subsystems are not shown by default and therefore you may sometimes see two or more devices in the left pane that have the same name. To display the subsystem for a particular device, point to it using the cursor and the subsystem is displayed in a tooltip.
-
To select variables to import, select a template from the left pane and expand it in the right pane, then select the network variable fields to import. Selecting a higher level component, for example a LonMark object, will automatically select all those components subordinate to it.
-
To select devices to import, expand the configuration tree in the left pane to display the device instances (nodes) then select the devices you want to import.
Selecting the variables and configuration properties to import
After importing and selecting the variables and devices to import, the next step is to customize these elements via the Import variables dialog.
-
To rename a configuration item, select it and press F2.
If a variable is displayed in red, it means that it is invalid for use in PcVue and will not be generated. Use the Rename variables dialog to ensure variable name compliance:
- The max length of a variable name is 255 characters.
- The max number of branch elements in a variable name is 12.
- The name of a branch element or the name of the leaf element cannot be empty (length =0) or exceed 255 characters.
- The name of a variable can only include letters, digits, or the underscore.
- Variable names shall be unique. Two variables cannot have the same name.
-
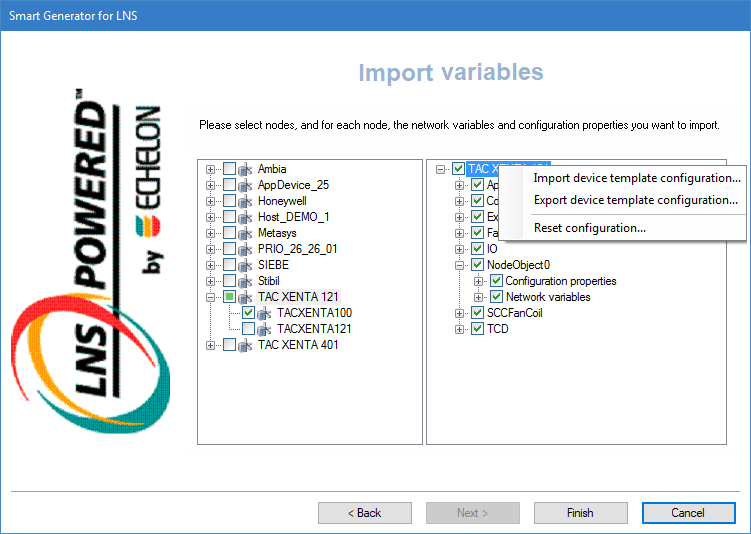
To export the configuration of a template, right-click on a template, then click Export device template configuration. The export creates an XML file containing the template configuration with the selected variables and those that have been added manually. By default, the XML file is saved with the same name as the template, in the PcVue BIN folder.
Show picture -
To import the configuration of a template, right-click on a template then click Import device template configuration. This imports other instances of the same template, either in the same or in another project.
-
To add a variable, right-click a network variable object in the right pane and select Add variable from the pop-up menu then enter a variable name and select the expression using the Field drop-down box. Click OK to close the Properties dialog. The new variables are automatically generated for each device based on the template configured.
LonWorks variables sometimes have a complex structure and it is necessary to use an expression to select the correct data to be linked to PcVue variables. This is normally done as part of the process of configuring variables in PcVue.
-
To change the LNS monitoring behavior, right-click a network variable component in the right pane and select Properties from the pop-up menu. The change made is applied to all imported variable fields below the network variable level. The following properties can be configured:
-
Use default parameters - If selected, It uses the values of the Bind this variable property and Poll interval property taken from the default set in the LonWorks Network configuration dialog.
-
Polling rate (seconds) - If specified, it defines the interval at which PcVue polls the LonWorks node.
The changes made to the variable's default configuration before import are applied to a template and will therefore affect variables generated from any device based on that template.
-
-
To change the property Permanent scan for mimics, click on a variable field component in the right pane and select Properties from the pop-up menu. The change must be made per variable. The following properties can be configured:
-
None - If selected, it polls variable's real time value only when a mimic using it in an animation is open.
-
Server only - If selected, it polls the variable's real-time value permanently on the station where it is produced. On all other stations, it behaves as None.
-
All stations - If selected, it polls the variable's real-time value permanently on all stations.
-
Click Finish and Yes in the Generation dialog to start the generation of variables in PcVue. A dialog is displayed indicating the progress. Any variables in the smart generator that already exist in PcVue are discarded. The corresponding variables in PcVue are not overwritten or updated in any way.
Any variables appearing in red are invalid and will not be generated when clicking Finish.
Synchronizing an existing import
When you synchronize an import, the smart generator compares the configuration elements available in the import file with those that have been imported previously to PcVue.
The synchronizing process takes into account any filter that you may have used previously with the import. For example if there are 400 variables in the import file and the previous use of the import was with a filter and created 100 variables in PcVue, synchronization will inform you that there are 300 new variables available for import.
-
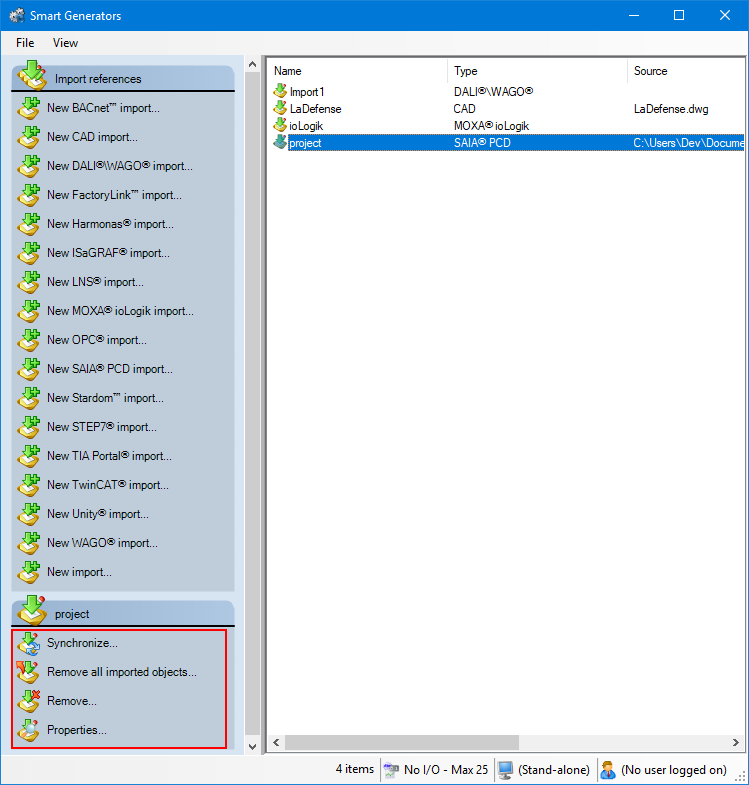
Select the import to synchronize in the right pane of the Smart Generators dialog. A list with actions appears under the Import references pane.
Show picture -
Click Synchronize. This will open the smart generator dialog in which you can reconfigure the import. If variables have been added to the import file since the last import, the smart generator will display the Import new variables dialog, inviting you to make either a full or a custom import of the remaining variables.
-
If you select full import, all variables not already in PcVue are imported.
-
If you select custom import, you can filter the variables using the Select variables dialog.
-
If the smart generator finds variables in PcVue that no longer exist in the import file, a list of the variables is displayed. Using this list, you can choose to remove some or all of the variables from PcVue.
You can choose to only remove imported configuration elements of a smart generator without removing the smart generator import itself. This can be done by right-clicking the import generated and selecting Remove all imported objects.