Installing PcVue
This topic describes the attended installation when using the wizard.
The product can also be installed silently.
See Silent installation for more information.
Prerequisites installation
The prerequisites are components that must be installed before PcVue
When the installation is started, it first checks for the presence of the prerequisites on the computer and installs the missing ones.
The installation wizard
The PcVue installation automatically follows that of the prerequisites.
A wizard guides you through the installation process, prompting for information where necessary. The exact process will depend on the options you choose, the operating system and what software components are already installed on your computer but the main stages are as follows.
At each step, after configuring any options click the Next button to proceed. Clicking the Cancel button at any time will abort the installation.
- Welcome to the InstallShield Wizard - This is the first step of the installation itself. Click Next to continue.
 Show picture
 - What's new - Take a minute to discover what the product has to offer and click Next to continue.
- License agreement - Before you can continue with the installation you should read the License Agreement and select I accept... or I do not accept... as appropriate. Click Next to continue only if you accept the agreement. Show picture
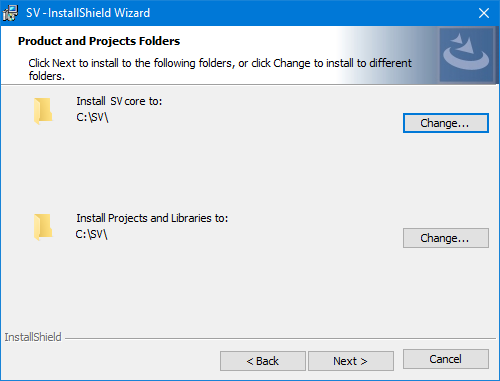
- Products
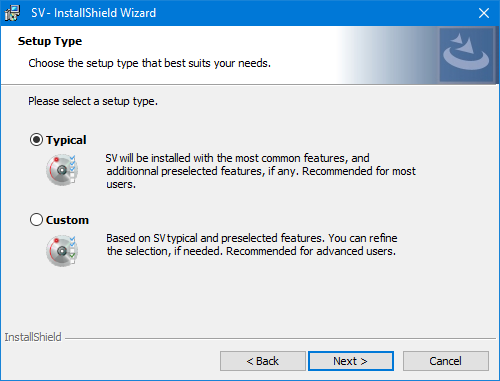
To install the software elsewhere, use the Change button to select another pathShow picture - Setup Type - Select the setup type from the following options. Show picture
- Typical - Installs the most common features and preselected options for the software, taking into account the selection made in the Features Selection Menu.
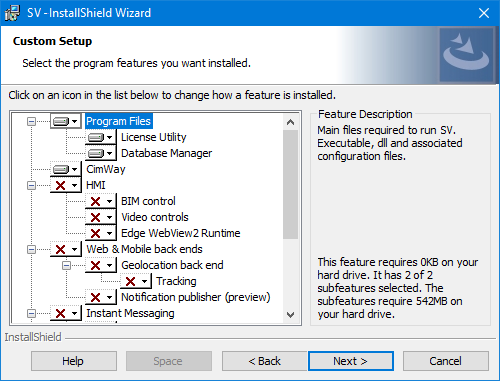
- Custom - Allows you to select exactly which components you want to install. The selection is the same as for Typical. Recommended for advanced users. Show picture
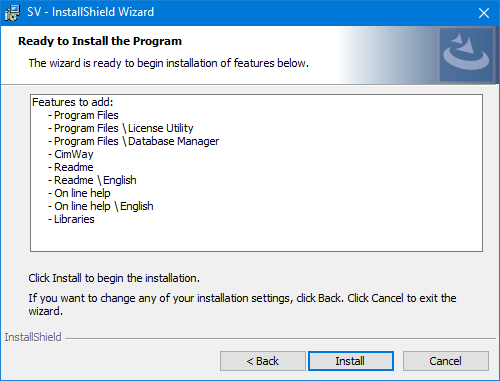
- Ready to Install the Program - Asks whether you wish to complete the installation or to review or change the options you selected.
Click Install to proceed with the installation, Back to return to the options or Cancel to abort the installation process.Show picture - Installing status: A progress bar indicates progress with installing each component, then a dialog confirms that the installation is complete. Click on Finish.


Completing the installation
Once installation is completed, you may be prompted to re-boot your computer. This re-start is sometimes necessary to register some of the files needed to run PcVue with the operating system.
Now that the product is installed, the next step is to create a project with it. See Creating a project and starting PcVue for the first time for more information.
Updating and patching an installation
You can have several versions of the product installed side-by-side on a computer host, for example versions 16 and 17, but you can have only 1 release of a given version installed. The information here is about updating a given installed version by installing a newer release of it. Updating a version has no effect on the other versions installed on the host, except that the Component registration will have to be perform before you can start any of them.
If you start the installation on a computer where an earlier release of the same version is already installed, the installation process automatically updates the currently installed release.
A version can be updated or patched by installing from a Standalone package or a Cumulative patch.
In most cases, the installation will update the product without changing the list of installed features
In some cases, depending on the exact content of the update, the installation process needs to uninstall the existing version before re-installing the new one. You then have the opportunity to change the list of installed features at the same time as the update. It is never the case with a Cumulative patch.
How to verify the currently installed release
You can verify the exact release that is installed in several ways:
- If the product is running, open the About box via the
menu Help.Aboutor by pressing thekey F4. The first tab displays the build number of the release you are running. - Open the File explorer and navigate to the Program folder where the version is installed, default C:\Program Files\ARC Informatique\PcVue 17\
Product versionproperty is the build number of the release that is installed. - The build number is also traced at start-up, you can look it up using the Log Monitor. The same information is also available in the Windows event viewer and elsewhere if you have configured another target for logging & tracing.